How to Add Ruching to Bottoms for a Shapelier Bum
This post may contain affiliate links. Read about our privacy policy.
We’ve talked on our blog about how as parenting has busied up our lives we are relying more on “COTS” (Commercial-Off the Shelf) costumes over Bespoke (made to order) costumes. But that doesn’t mean we just buy “costumes” from Party City and call it good (though that may have happened once or twice). Usually, it means scouring the web for the perfect pieces, altering them, bedazzling them, and assembling a costume from there. So, it’s still work. It’s still “original”. It’s just a little easier than fully bespoke costumes.
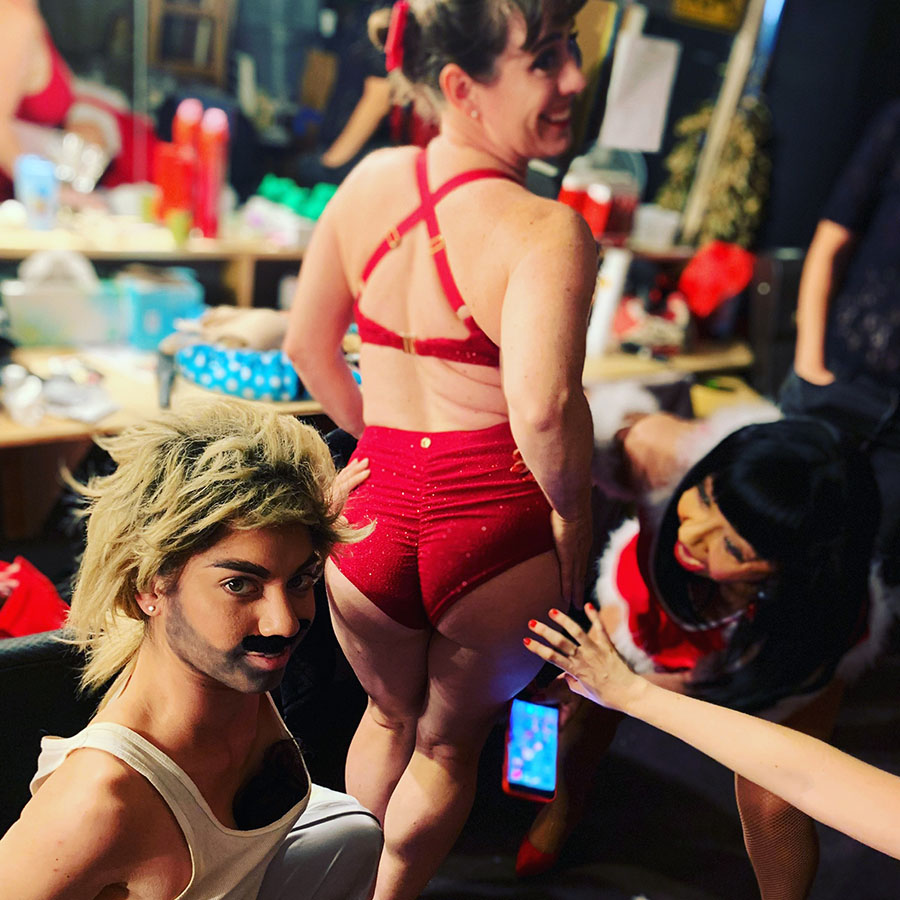
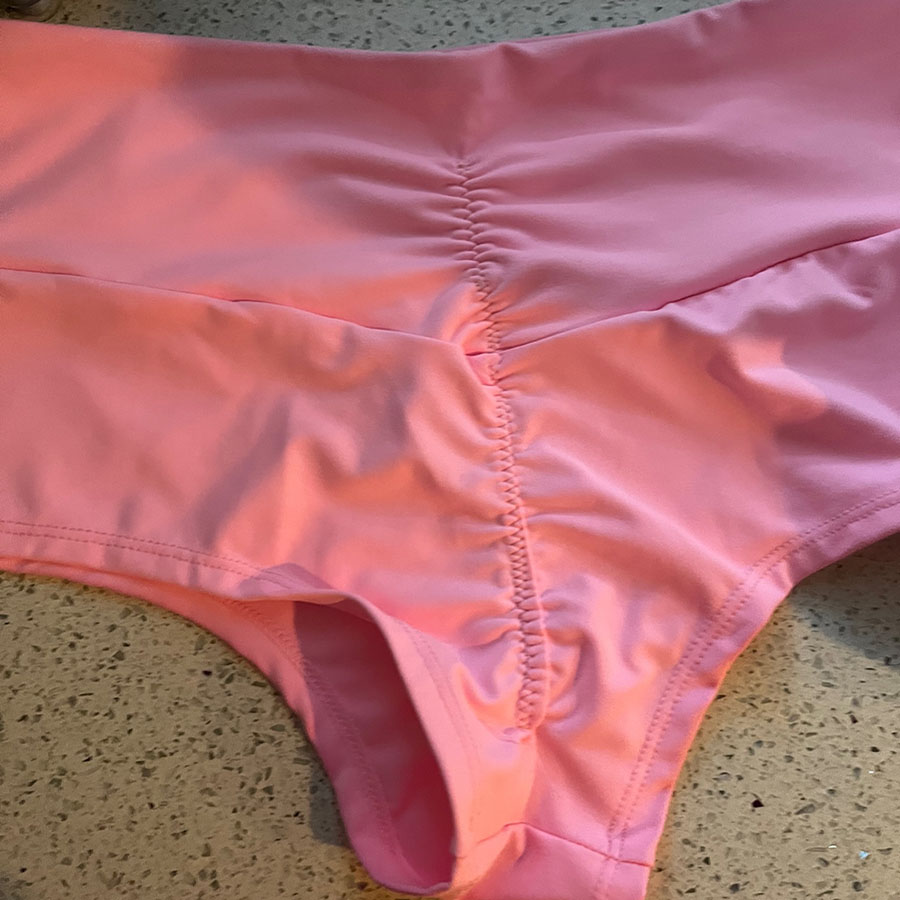
One thing that’s really easy to find online is bottoms. In a variety of styles, fabrics, colors, patterns, etc. Sometimes they need bedazzling, sometimes they don’t. Sometimes they are thongs and sometimes they have more coverage. When they have more coverage, one alteration that we love is to add ruching (gathering) along the center back to help accentuate the booty.
“Ruche” is a decorative gathering of fabric. I first encountered it on the sides of tank tops in the early 2000’s. It creates a specific look and kind of disguises things in the tummy area. I first remember it being used in bikini bottoms on Maui around 2010-ish. After my first pair, I was hooked. It’s a lot more comfortable than a traditional thong, and it can be more modest too if you are not up for full butt disclosure. It’s also pretty simple to add to a pair of off-the-shelf bottoms.
Sewing with Stretch materials and elastic takes a little bit of skill but can be done with a standard sewing machine. Here’s what you need:
- Bottoms
- Sewing Machine (set to a zig-zag stitch)
- 3/8” to 1/2” elastic
- “Ball Point” sewing machine needle
When sewing with “stretch” or “knit” fabrics it’s best to use a “ball point” needle. The needle will go between the threads of the fabric rather than through and will keep the fabric from snagging or puckering. As a note – I did this project with a regular needle because I’m lazy, so if you don’t have a ballpoint needle don’t panic, just do a test run to see how your needle will affect your fabric and elastic – but if you can get one, a ball point needle is highly recommended.
A normal straight stitch on a sewing machine doesn’t stretch, so you cannot use it with stretch material – the stitch will break when the material stretches. Some sewing machines will come with a “Stretch Stitch” setting. It looks like 3 vertical lines III and allows for extra bobbin thread to stretch by oversewing every stitch. Even if you don’t have that stitch you can still sew stretch material with a zig-zag stitch (all residential sewing machines should have this). My sewing machine has both, but for this application, I prefer the zig-zag stitch. I used 1/2” elastic and these were my stitch width/length settings:
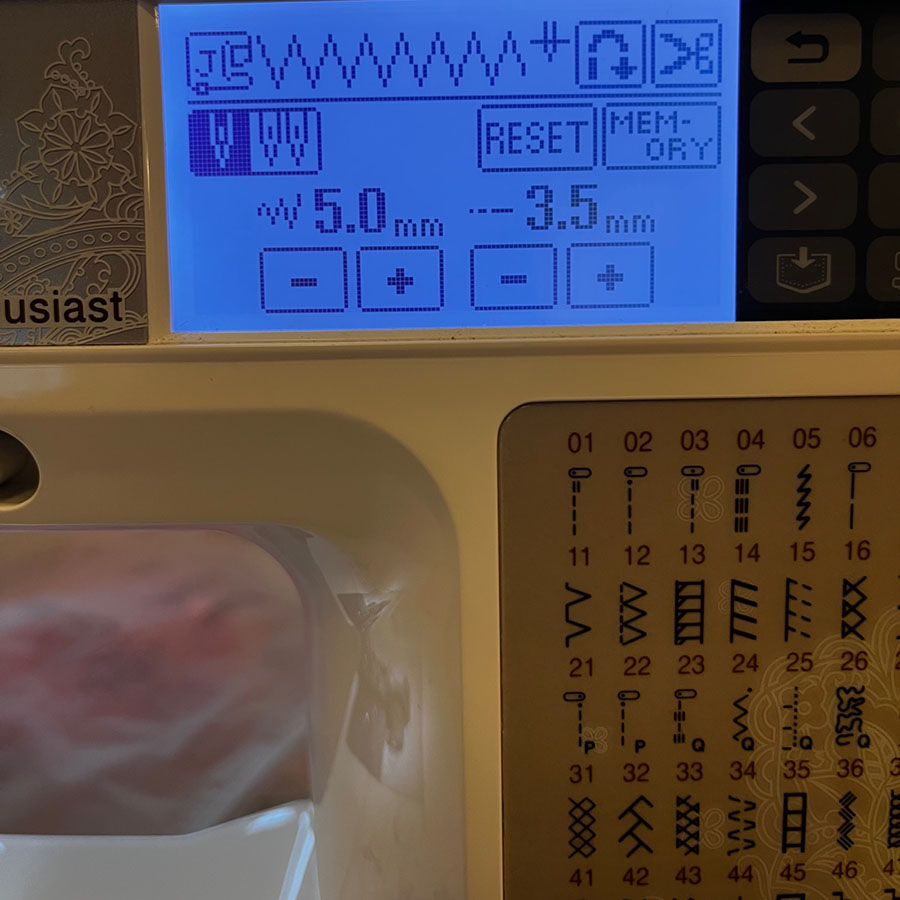
That’s a width of 5.0 (the widest for my machine) and a length of 3.5 (longer than the standard 2.5 for a straight stitch). This got me the right gathering look that I wanted.
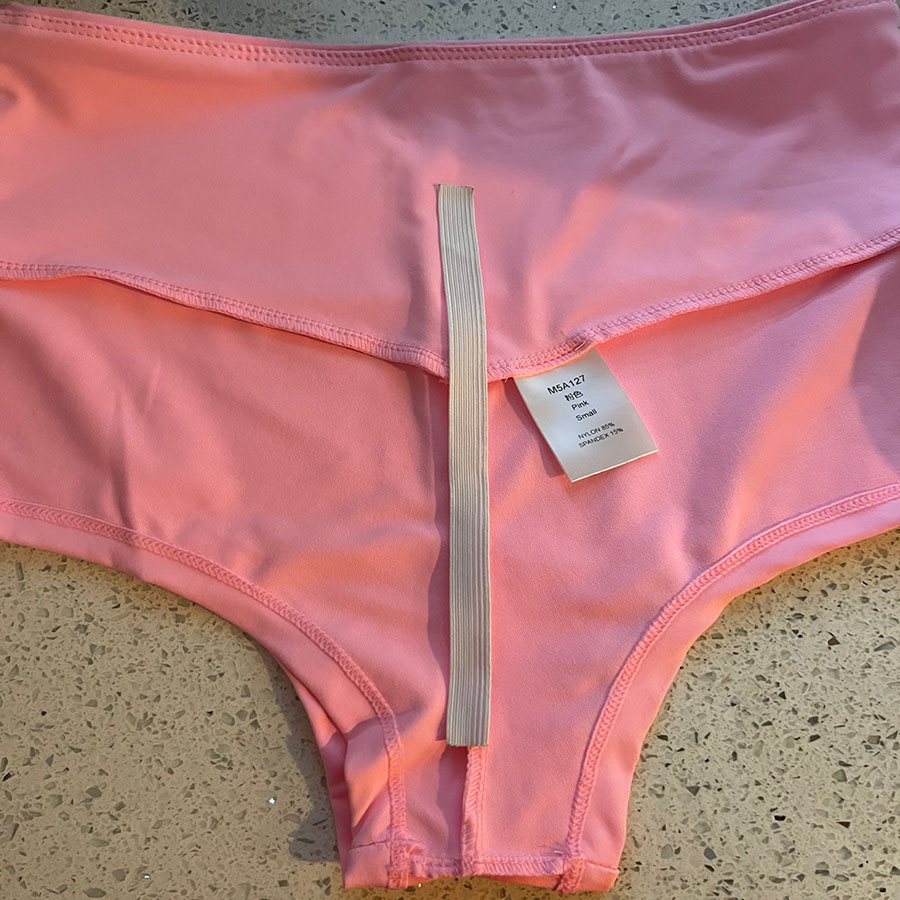
To get started you want to figure out how far up and down your crack you want the ruching. These bottoms are high-waisted and I wanted ruching to cover the gamut. You’ll want your elastic shorter than that distance because it will be doing the gathering for you. After cutting your elastic use a match or a lighter to melt the ends of your elastic to keep it from fraying.
Note: I tested this out a couple of times to figure out how far I wanted the ruching to go, to find the right size elastic, and to get the right settings. So, try it out – don’t be afraid to rip some seams (just don’t tear the fabric). I think I had to rip it out twice before I got it to where I wanted it.
The next step is to pin your elastic. I pinned mine at the top, bottom, and middle trying to make sure I had evenly spaced the excess fabric between the pins. (I didn’t get a pic of this while I was actually sewing these so I had to fake it after the fact for this pic which is why the elastic isn’t cut.)

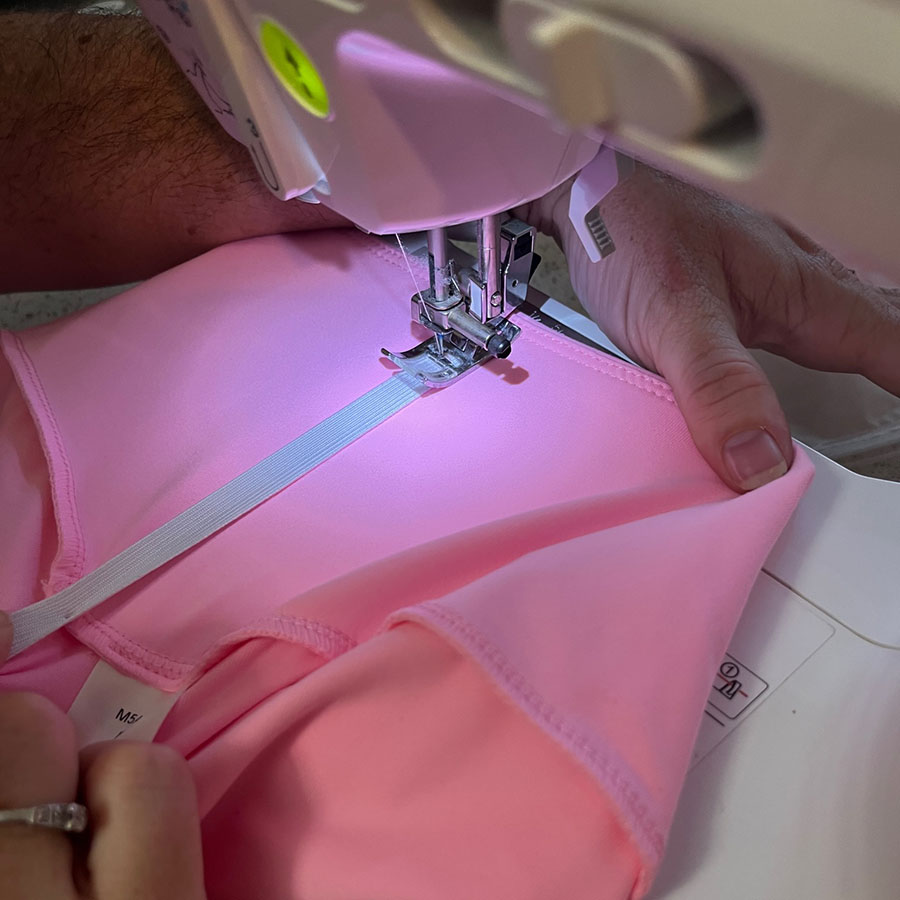
Sewing this does take a little finesse. You need to stretch out the bottoms while sewing along the elastic to create the gathers. It can be tricky to keep everything straight so if you need to you can add extra pins. I keep my sewing machine at about mid-speed for this so I can keep everything in the right place.
You’ll want to anchor your stitches by holding the fabric and elastic in place (you might have to fight your machine a little here) and letting it sew back and forth a couple of times to create a tack. Once you’ve done that stretch out the bottoms so the elastic is flat on top of the fabric and sew as even as possible taking out the pins before you sew over them.
And that’s it. Granted it’s not the easiest sewing project, but if it’s something you can master it’s an easy way to upgrade those store-bought bottoms. From booty shorts to bikini bottoms, ruching will help to accentuate your assets.
As a bonus, check out how to do something similar with your fishnets for some shapely booty under a thong: https://21stcenturyburlesque.com/burlesque-costume-tutorial-tricks-with-tights/
Disclaimer: This post includes affiliate links, and I will earn a commission if you purchase through these links. Please note that I’ve linked to these products purely because I recommend them and they are from companies I trust. There is no additional cost to you.
Related Posts


Comments (0)