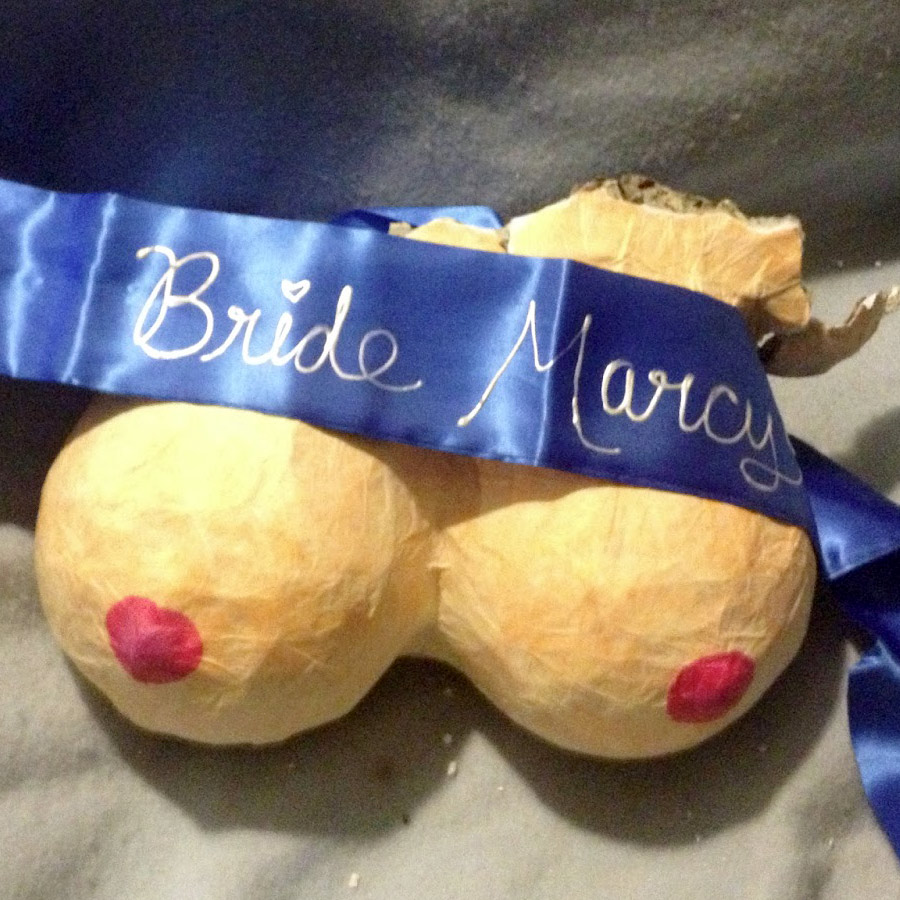
How to Make a Boob Pinata
This post may contain affiliate links. Read about our privacy policy.
It’s been a long time since I’ve done Paper Mache, but it’s not exactly a tricky skill. I followed this instructable. It had a lot of good tips – especially the jar lid thing, genius – and though I strayed from a few of them (I let it dry for way less than 24 hours between sets of layers – I didn’t have a lot of time) it turned out great.
When designing my boob pinata I did a little Google image research and found that most boob pinatas ended up looking like bulging pink eyeballs. So I decided it would need some context so I planned on doing more of a bust (lol) sans head.
My first attempt at making the inner frame didn’t work out. I tried a cereal box for the shoulders/chest and paper to make a neck, with two balloons for the boobs. It didn’t work out and I accidentally popped the balloons while trying to adjust things. So I decided to use just (well majority) balloons like she did in the very helpful instructable.
I had bought several bags of balloons since I didn’t know what I’d need. I had 12″ balloons, 8-9″ balloons and a bag of a random assortment of other shaped balloons. I used two 12″ balloons for the boobs, and 3 long skinny balloons from the assortment for the chest, and two small balloons from the assortment for the shoulders.
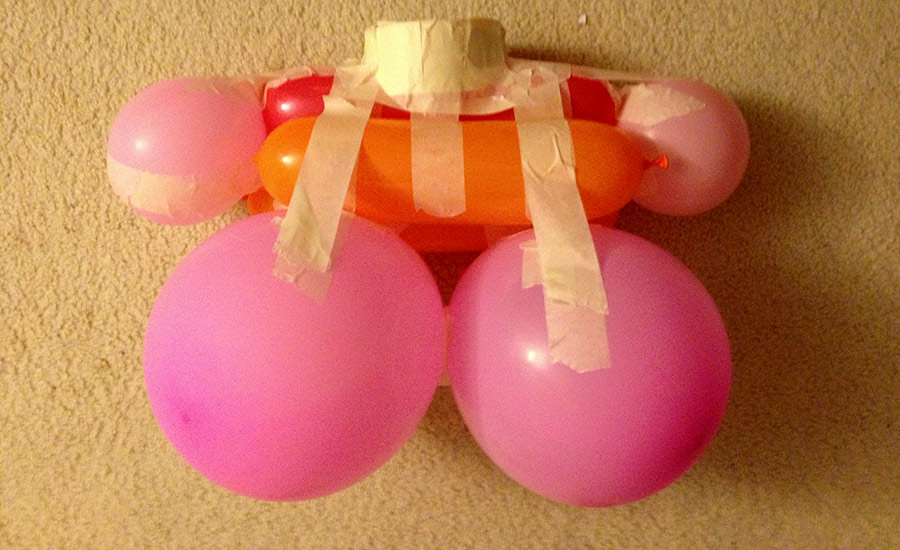
Then I just followed the instructable. I did two layers of newspaper at a time over a day and a half (Thursday night, Friday morning, Friday night).
I did figure out a good trick. While doing multiple layers at a time it was often hard to tell where I’d already gone. Especially on the second layer when everything was wet. So I started alternating layers with ads – that are very colorful – and articles – that are only black and white. That way I could tell where I still needed to go on the layer I was working on.
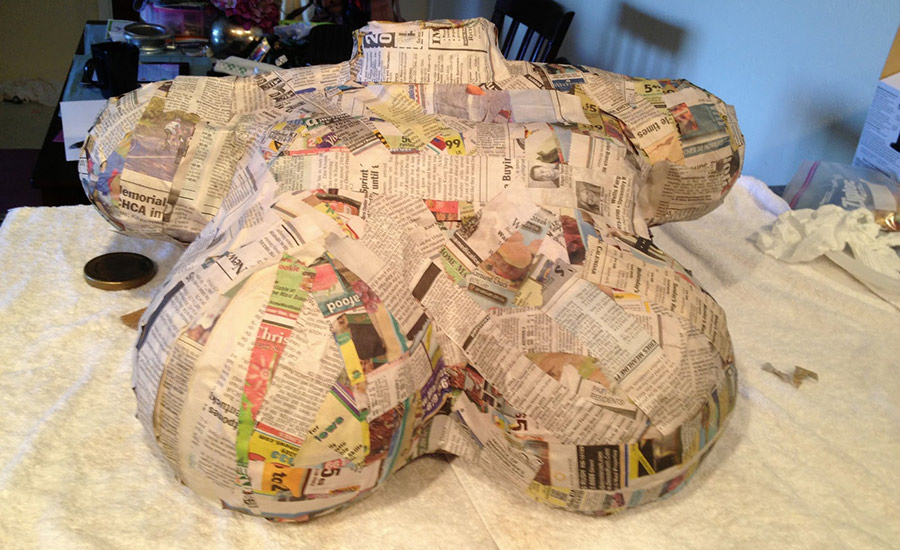
I added nipples during the second set of paper mache-ing. I just bunched up some newspaper and used some strips to hold them in place.

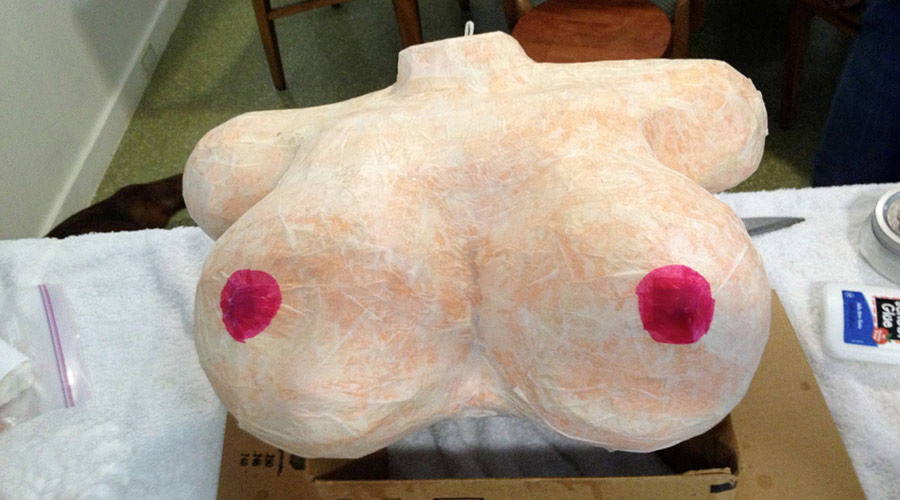
I couldn’t find tissue paper in a skin tone, so I did two layers of peach (sorry, no picture of that either). I did the peach layers right after the white layer. Since I was doing decoupage I just put the dry tissue paper right on the wet white layer, then went over it after with a 1/3 Elmer’s glue, 2/3 water mixture that I applied with a large paint brush.
After the peach layer dried (Saturday afternoon) I added two layers of a kinda off-white tissue paper, then added nipples (they are a bit brighter than I wanted them to be, but oh well.
When adding the white layer it looked like she had a weird skin disease, but it turned out pretty awesome.
The party was Saturday night. I used a fan to speed up the drying process, and occasionally a hair dryer for wetter spots.
I cut a door in her back between the peach layers and the off white layers and taped it up and added some extra white strips for support.

I was worried that since we had sped up the process so much – and only done 7 rather than the recommended 8 layers – that she would break immediately, but she held up pretty well. It took 6 of us to finally break it, and the winning hit was done without a blindfold since we were pretty much done.
The boobs themselves only dented and the final break happened in the chest, so they get to keep the boobs.
It was pretty awesome all around.
I also make a pin the piercing on the nipple game, but that’s just a little too risque to post a picture of. Sorry, lol.
Disclaimer: This post includes affiliate links, and I will earn a commission if you purchase through these links. Please note that I’ve linked to these products purely because I recommend them and they are from companies I trust. There is no additional cost to you.


This Post Has 0 Comments